MultiSample120D Instructions For Use
|
Gold Standard Phantoms |
Document ID: PD-3000-6006 |
Foreword
These instructions for use contain all the information necessary to operate the MultiSample120D in accordance with its specifications. This information includes explanations of the functions of the controls, displays and signals, the sequence of operation, and connection and disconnection of the parts and accessories you can remove.
You must regard these instructions as a part of the equipment. It is important that these instructions are read thoroughly.
Disclaimer
Gold Standard Phantoms considers itself responsible for the effects on safety, reliability and performance of the equipment only if:
Assembly operations, re-adjustments, modification or repairs are carried out by persons authorised by ourselves, and
The electrical installation of the room where the device is used meets the requirements of the standards in force, and
The device is used in accordance with this instruction manual.
Figures within this instruction manual may display other models of the MultiSample. This is for demonstration purposes only.
Glossary and Abbreviations
Term | Description |
|---|---|
MRI | Magnetic Resonance Imaging |
NMR | Nuclear Magnetic Resonance |
MS120D | MultiSample120D |
Introduction
About this Instruction Manual
The purpose of this instruction manual is to promote the safe use of the MultiSample120D phantom during its expected service life. It describes the use of the device as intended by the manufacturer.
Identification
Product Name: MultiSample120D
Model: MS120D
%20-%2007-08-2025%2010-33-54.png?inst-v=c3d5e938-023e-41b7-b0f5-005879dbf7f9)
Manufacturer and Contact Information
Company Identification | Gold Standard Phantoms Limited |
Telephone | +44 (0)114 3271540 |
Email (competent person) | |
Languages spoken | English |
EU Authorised Representative | AR Experts B.V. |
EU Authorised Representative Address | AR Experts B.V. Amerlandseweg 7 3621 ZC Breukelen The Netherlands |
EU Authorised Representative Email Address |
Intended Use
The MS120 is intended to be used for quality assurance of Magnetic Resonance Imaging Scanners (MRI). The MS120 allows consistency of image quality and scanner performance over time. The MS120D is also intended for the development of protocols and pulse sequences. This provides a stable, repeatable and controlled environment for testing new sequences and parameters.
Intended Users
The MultiSample120 is intended for use by scanner operating personnel. The device must be used by competent personnel who has the applicable education and experience. This includes but is not limited to:
Radiographer/MRI Technologist
Clinical Scientist/Hospital Physicist
MRI Physicist
Radiologist
Students/Researcher
Other trained Medical Professional
The device must be used by a skilled person who has the applicable education and experience to enable them to perceive risks and to avoid hazards which operation or maintenance of the device can create.
Warnings and Cautions
About Warnings and Cautions
Essential safety descriptions are provided in the instruction manual in the form of either a Warning or a Caution, as described below:
A WARNING is given when the personal safety of the patient or a user can be affected. Disregarding this advice can cause an injury.
A CAUTION is given when special instructions must be followed. Disregarding this advice can cause damage to the device or other equipment.
All users must familiarise themselves with all the warnings and cautions contained in the instructions before using this device.
Device Description
About the MultiSample120D
The MS120D is a 120mm diameter cylindrical phantom designed for use in an MRI scanner. The MS120D is capable of holding up to 8 industry standard polypropylene centrifuge tubes. It addresses the need for a standardised container for multiple sample vials when preparing phantoms in-house for advanced MRI techniques.
Applications include:
Quantitative T1/T2 relaxometry
Metabolic imaging
Spectroscopy
Multi-nuclear imaging
Diffusion
Fat fraction
The MS120D can be supplied:
Empty, for the customer to fill as required.
With pre-filled vials.
With pre-filled vials, in a defined configuration, and with the main chamber filled.
Materials
Component | Materials Used |
|---|---|
Main Body and Sample Holder | Polycarbonate, Nylon, Nitrile rubber |
Vials and Caps | Polypropylene, Fluoroelastomer |
Phantom liquid | Distilled Water, Manganese (II) Chloride, Surfactant (C8-18 Ethoxylated Propoxylated), and preservative (methylisothiazolinone and chloromethylisothiazolinone) |
WARNING: The phantom liquid is a mild irritant and may be skin sensitising. In the event of a leak or spill of the phantom liquid wear protective waterproof gloves when cleaning any spillages and dispose according to local regulations. See the safety data sheet for more information.
Storage Instructions
Store
In a dry and well-ventilated environment
Between 15 °C and 30 °C
Out of direct sunlight
In an upright position
If possible, store the phantom in the MRI magnet room. This will ensure that it is at thermal equilibrium with the room and provide the most reliable and reproducible results. Either store in the supplied box, or use the supplied stand to store on a flat surface such as a shelf.
Cleaning
If an MS120 phantom requires cleaning it can be cleaned with soap, water, and a soft cloth or sponge to remove dirt and debris. Organic solvents such as isopropanol may be used to remove sticky residue on the main body, however these may cause the labels to stop adhering to the surface.
Getting Started
Unpacking the Equipment
The MultiSample120D box contains:
MultiSample120D
Vial location key card
Adjustable Torque Screwdriver
Stainless Steel Hex Bits (5mm and 6mm)
Spare Fixings
MultiSample120D Components
_.png?inst-v=c3d5e938-023e-41b7-b0f5-005879dbf7f9)
Figure 1: MultiSample120D Main Body and Sample Holder
MultiSample120D Main Body
Sample Holder attached to Enclosure Lid
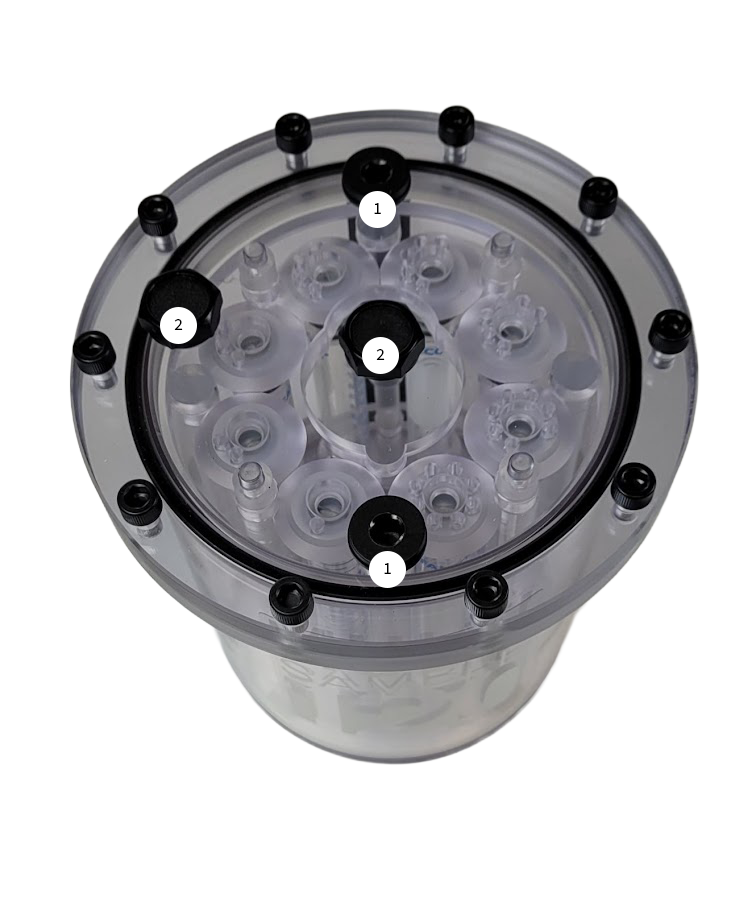
Figure 2: MultiSample120D Enclosure Lid
G1/4 BSP Filling Ports
M12x1.5 Accessory ports
.png?inst-v=c3d5e938-023e-41b7-b0f5-005879dbf7f9)
Figure 3: MultiSample120D Enclose Base
NMR Tube Fiducials
Controls and Indicators
The temperature of the Phantom can be monitored using the included liquid crystal thermometer:
.png?inst-v=c3d5e938-023e-41b7-b0f5-005879dbf7f9)
Figure 4: Liquid Crystal Thermometer
Note that this indicates the temperature of the outer surface of the phantom, and not necessarily the internal temperature. It provides an indication of the temperature, but should not be relied on for accurate temperature measurements. The phantom also comes with two NMR tubes filled with Ethylene Glycol, which can be used to assess the temperature of the phantom during scanning.
In addition, fibre optic temperature probes can also be inserted via the M12x1.5 Accessory Ports.
Operating Instructions
Torque Screwdriver
WARNING: The supplied torque screwdriver and stainless steel bits are made from steel and are magnetic. They should not be brought into the MRI scan room as they present a projectile hazard.
CAUTION: all screws must be tightened using the supplied torque screwdriver, with the torque correctly set as advised. Failing to do so may cause damage to the MultiSample120D.
A torque screwdriver is supplied with the MultiSample120D, so that the screws can be correctly tightened.
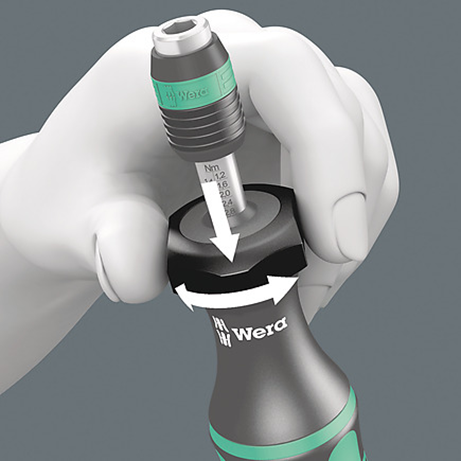
To set the torque of the screwdriver, push the adjustment ring down, and rotate the body of the screwdriver.
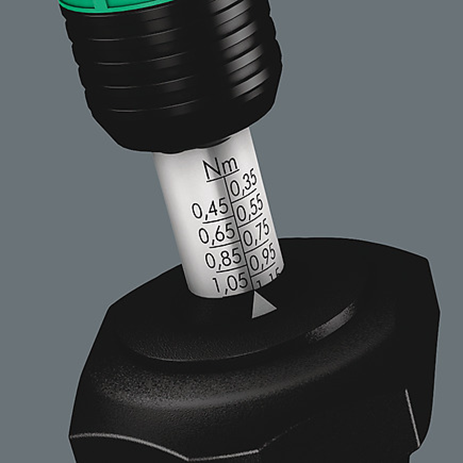
The torque setting is indicated with the white arrow.
The torque screwdriver has a clutch that slips when a torque above the set value is encountered. When the clutch slips it makes an audible click, indicating that the screw has been tightened to the correct torque.
When loosening screws the clutch will not slip, regardless of the torque setting.
Accessing the MultiSample120D Vials
To access the vials, the ten screws on the outer edge of the Enclosure Lid must be removed. This should be done with the Torque Screwdriver and 5mm Stainless Steel Hex Bit.
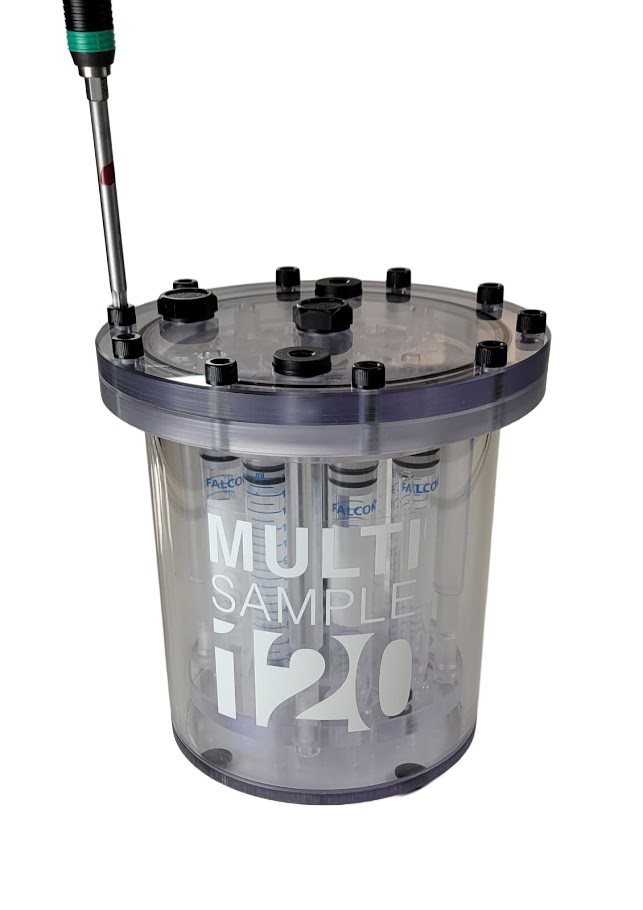
Figure 5: Removal of Enclosure Lid Screws
.png?inst-v=c3d5e938-023e-41b7-b0f5-005879dbf7f9)
Figure 6: Sample Holder Removed from Main Body
To remove the vials from the holder, the Base Plate of the sample holder must first be removed. This can be done by removing the 4 screws using the Torque Screwdriver and 5mm Stainless Steel Hex Bit.
.png?inst-v=c3d5e938-023e-41b7-b0f5-005879dbf7f9)
Figure 7: Removing screws from the Sample Holder Base Plate
The vials can be manually lifted out of their holder and then placed back into the holder to reassemble.
.png?inst-v=c3d5e938-023e-41b7-b0f5-005879dbf7f9)
Figure 8: Vial removed from holder
Assembling the MultiSample120D
To assemble the MultiSample120D, replace the bottom plate back onto the Sample Holder and screw in the 4x polycarbonate screws with the Torque Screwdriver and 5mm Stainless Steel Hex Bit. The Torque Screwdriver should be set to 0.5Nm. Ensure the plate is level and tighten the screws in opposite pairs: an example can be seen in Figure 9.
Place the Sample Holder back into the main body of the MultiSample120D.
To align the Sample Holder correctly with the main body of the MultiSample120D, ensure that the filling ports are aligned to logo sticker on the main body. The accessory ports should be facing to the left.
Before fitting the screws, ensure the O-ring is placed within the groove.
The MultiSample120D lid is fixed using ten glass filled polyamide M6 screws which are located on the outer edge of the lid. Screws should be fitted and tightened using the Torque Screwdriver and 5mm Stainless Steel Hex Bit. The Torque Screwdriver should be set to 0.8Nm.
First tighten Screws in the lid should be tightened in opposite pairs: an example can be seen in Figure 10.
Once tightened, this process should be repeated to maintain tightness of the screws.
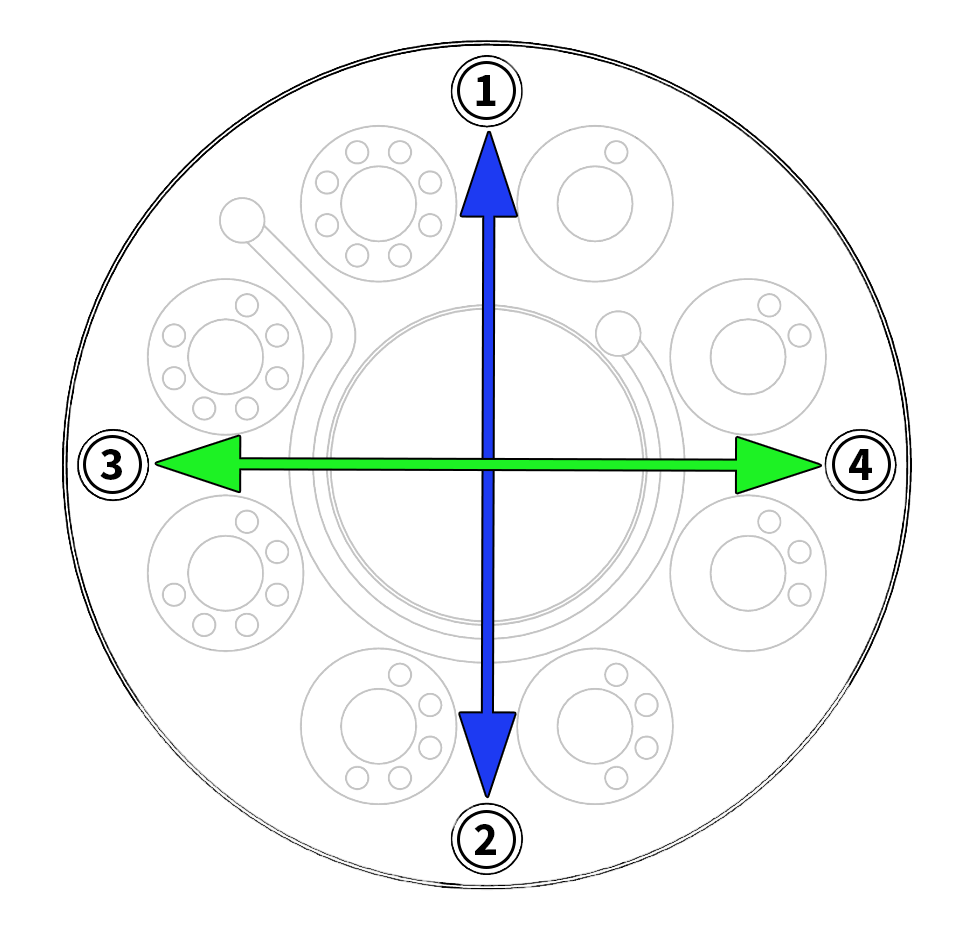
Figure 9: Sample Holder Base Plate Screw Order
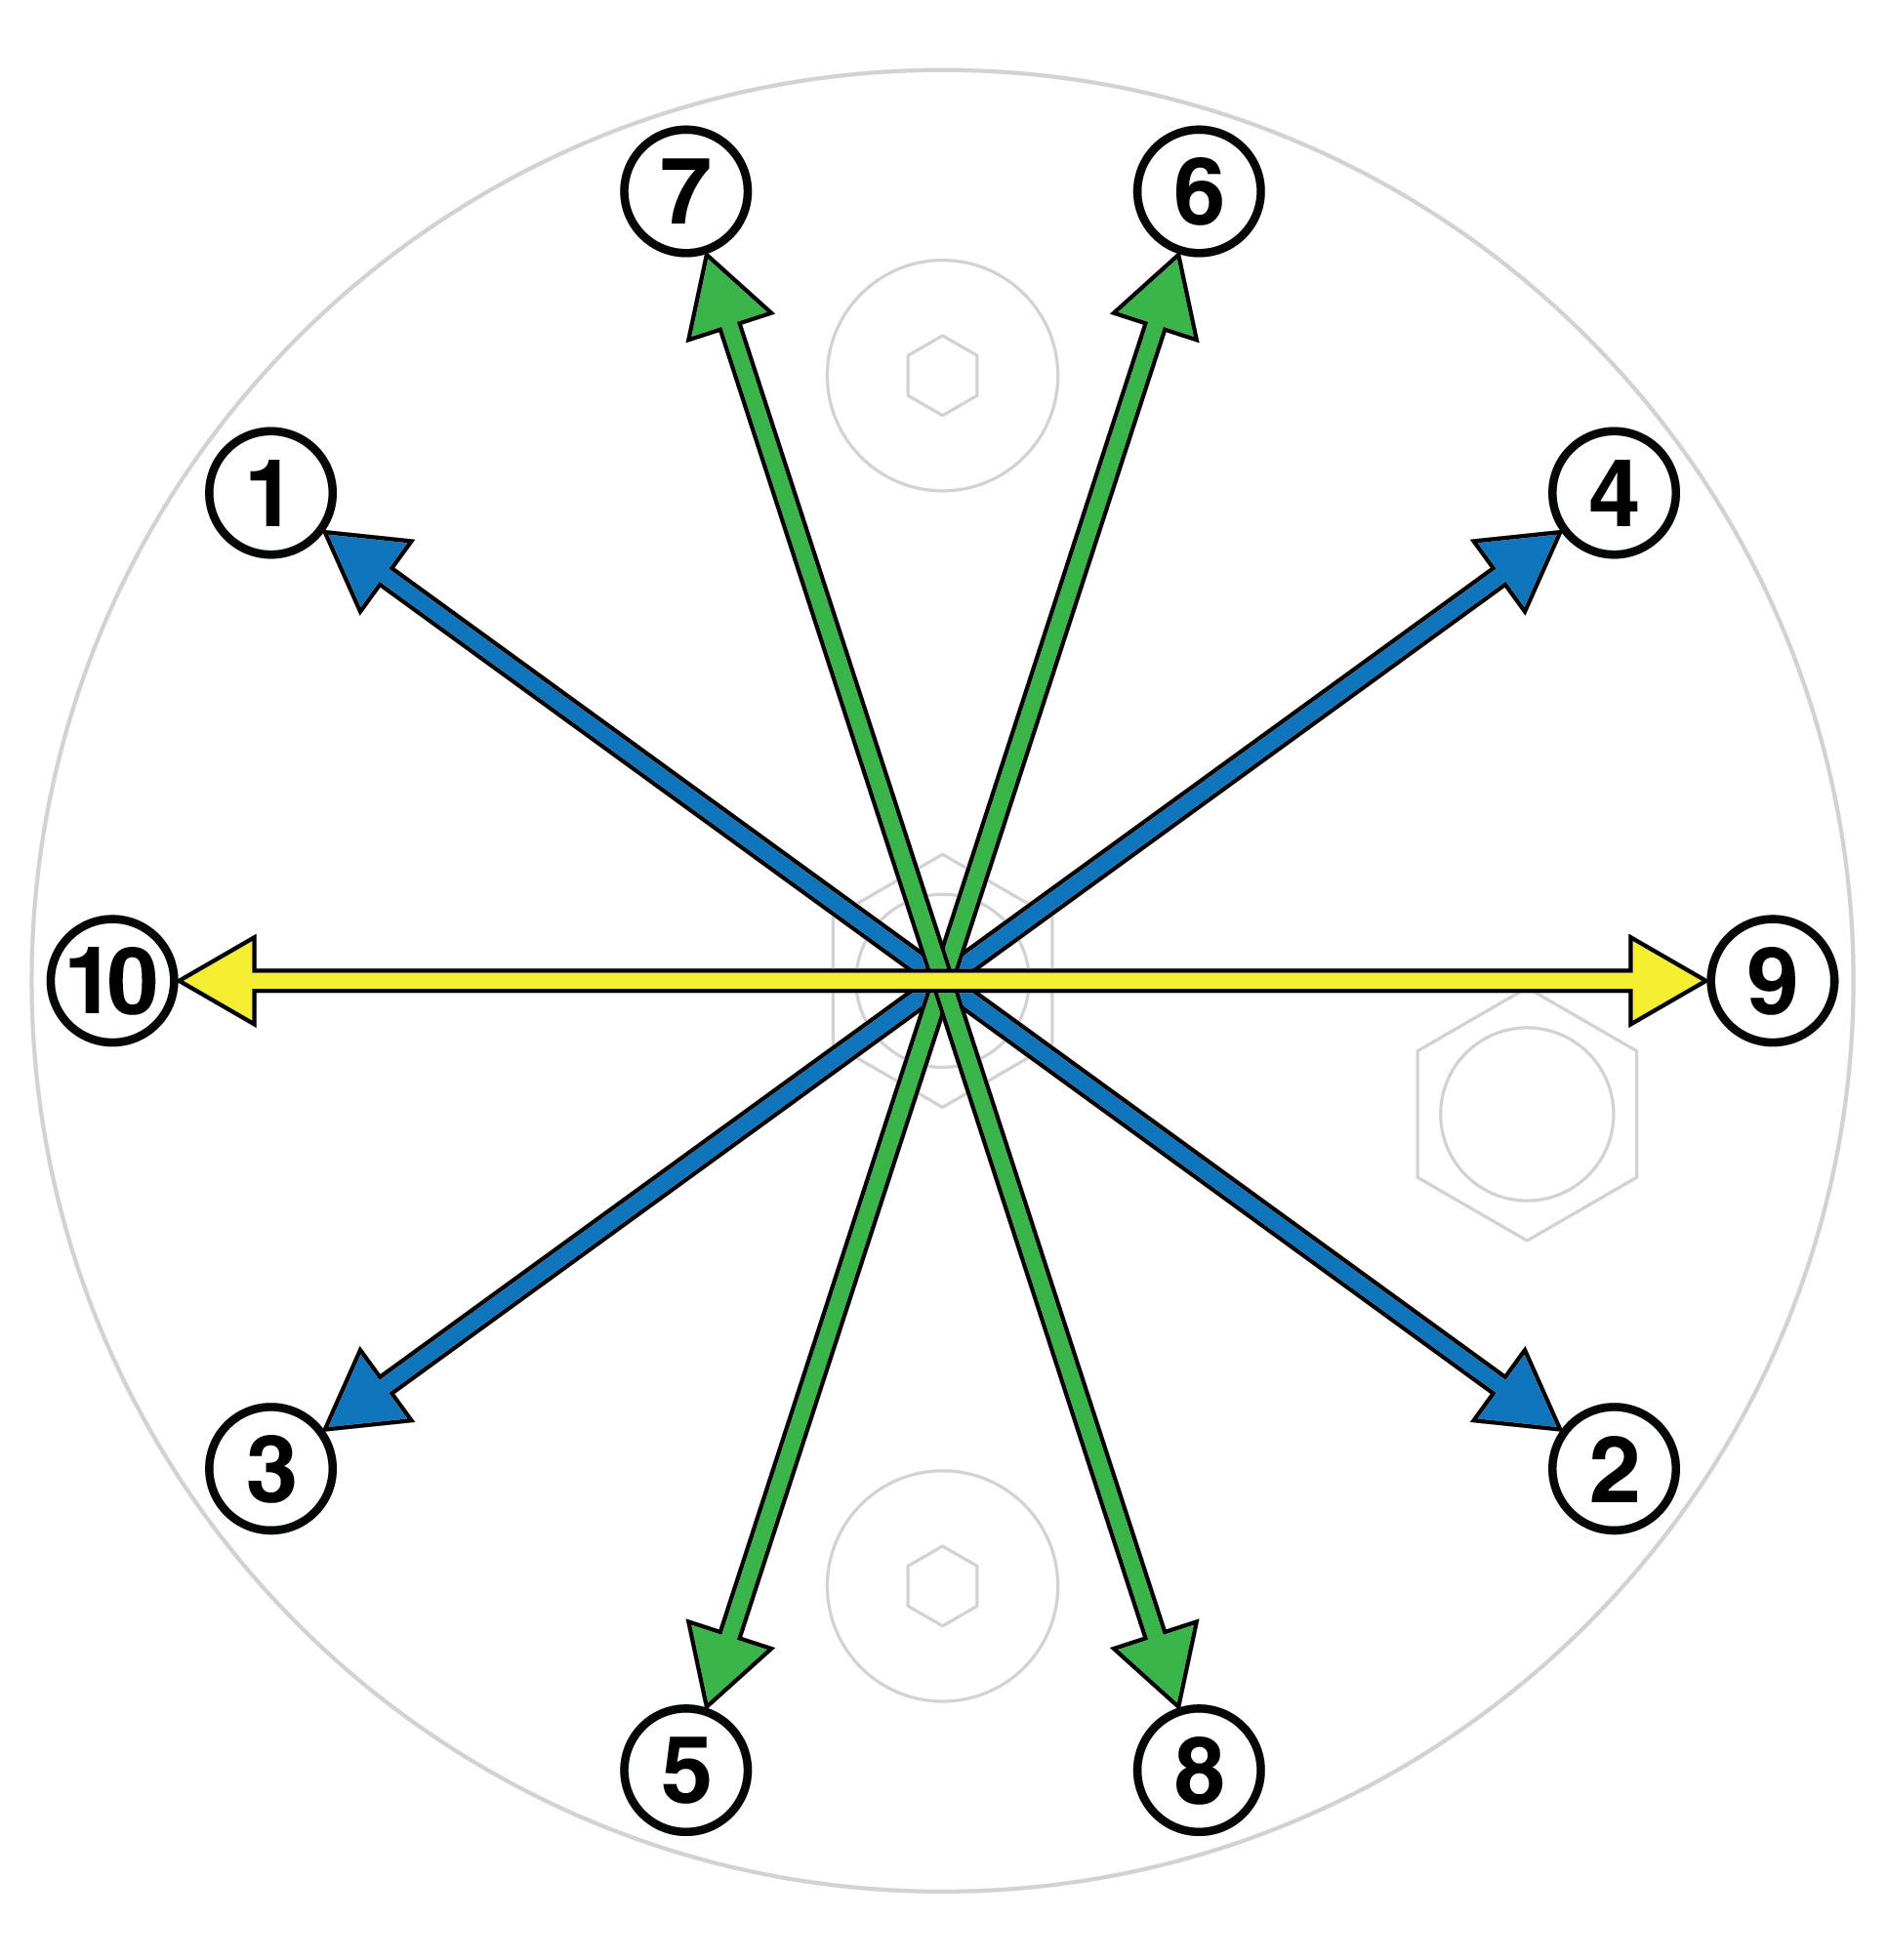
Figure 10: Enclosure Lid Screw Order
Filling the MultiSample120D
The main chamber of the phantom can be “flood filled” filled with an appropriate liquid during scanning to ensure:
good susceptibility matching between the sample and the background, optimising B0 homogeneity.
background signal
coil loading.
There are two G1/4 BSP filling ports in the lid to facilitate filling. These have solid polyamide screw-in caps with a 6mm hex socket. To fill and cap:
Unscrew both filling ports, using the supplied Torque Screwdriver and 6mm Stainless Steel Hex Bit.
Fill the chamber with the chosen flood fill liquid. A funnel (not supplied) can help here. Fill as much as possible.
Cap both filling ports (hand tight), then invert the phantom to move any residual bubbles to the end of the chamber. Allow any small bubbles to coalesce into larger bubbles.
Turn the phantom right-side-up. Open one of the filling caps.
Tilt the phantom so that the open fill port is raised up. Any bubbles will travel to this port.
Top-up the liquid until the chamber is completely full. A syringe or pipette can help here. Fill until the liquid is at the top of the filling port.
Re-fit the cap, and screw down so that the port is sealed but the torque screwdriver does not click.
Dry any residue around the port.
Check that there are no bubbles in the chamber. If satisfied both ports can not be fully tightened to 1.2Nm.
Note: Polycarbonate plastic is permeable to water vapour. Over time air bubbles may appear in the main chamber due to evaporation of water, so periodic topping up is recommended.
Temperature Monitoring
The MultiSample120D can be fitted with two fibre optic probes. This can be done by removing the two M12x1.5 accessory ports and fitting the probes.
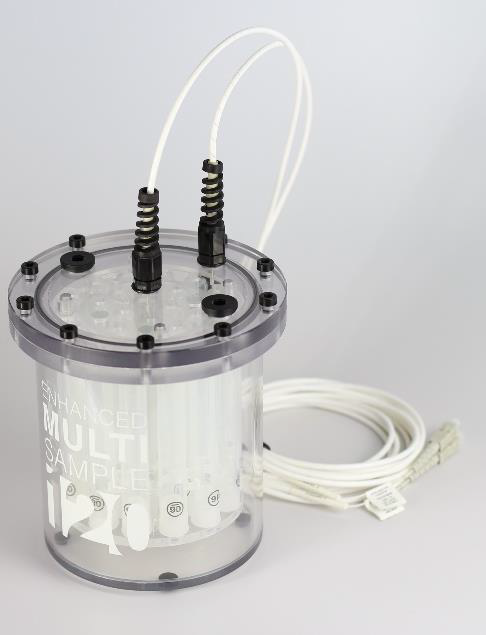
Figure 11: MultiSample120 (S, E, D) Temperature Ports with Fibre Optic Probes
Recommended orientation during scanning
The recommended orientation for the MultiSample120D during scanning is given below:
The MultiSample120D logo is placed facing upwards.
The filling ports should be facing downwards and to the right.
Vials should be orientated in clockwise rotation (front view) as seen on vial location key card.
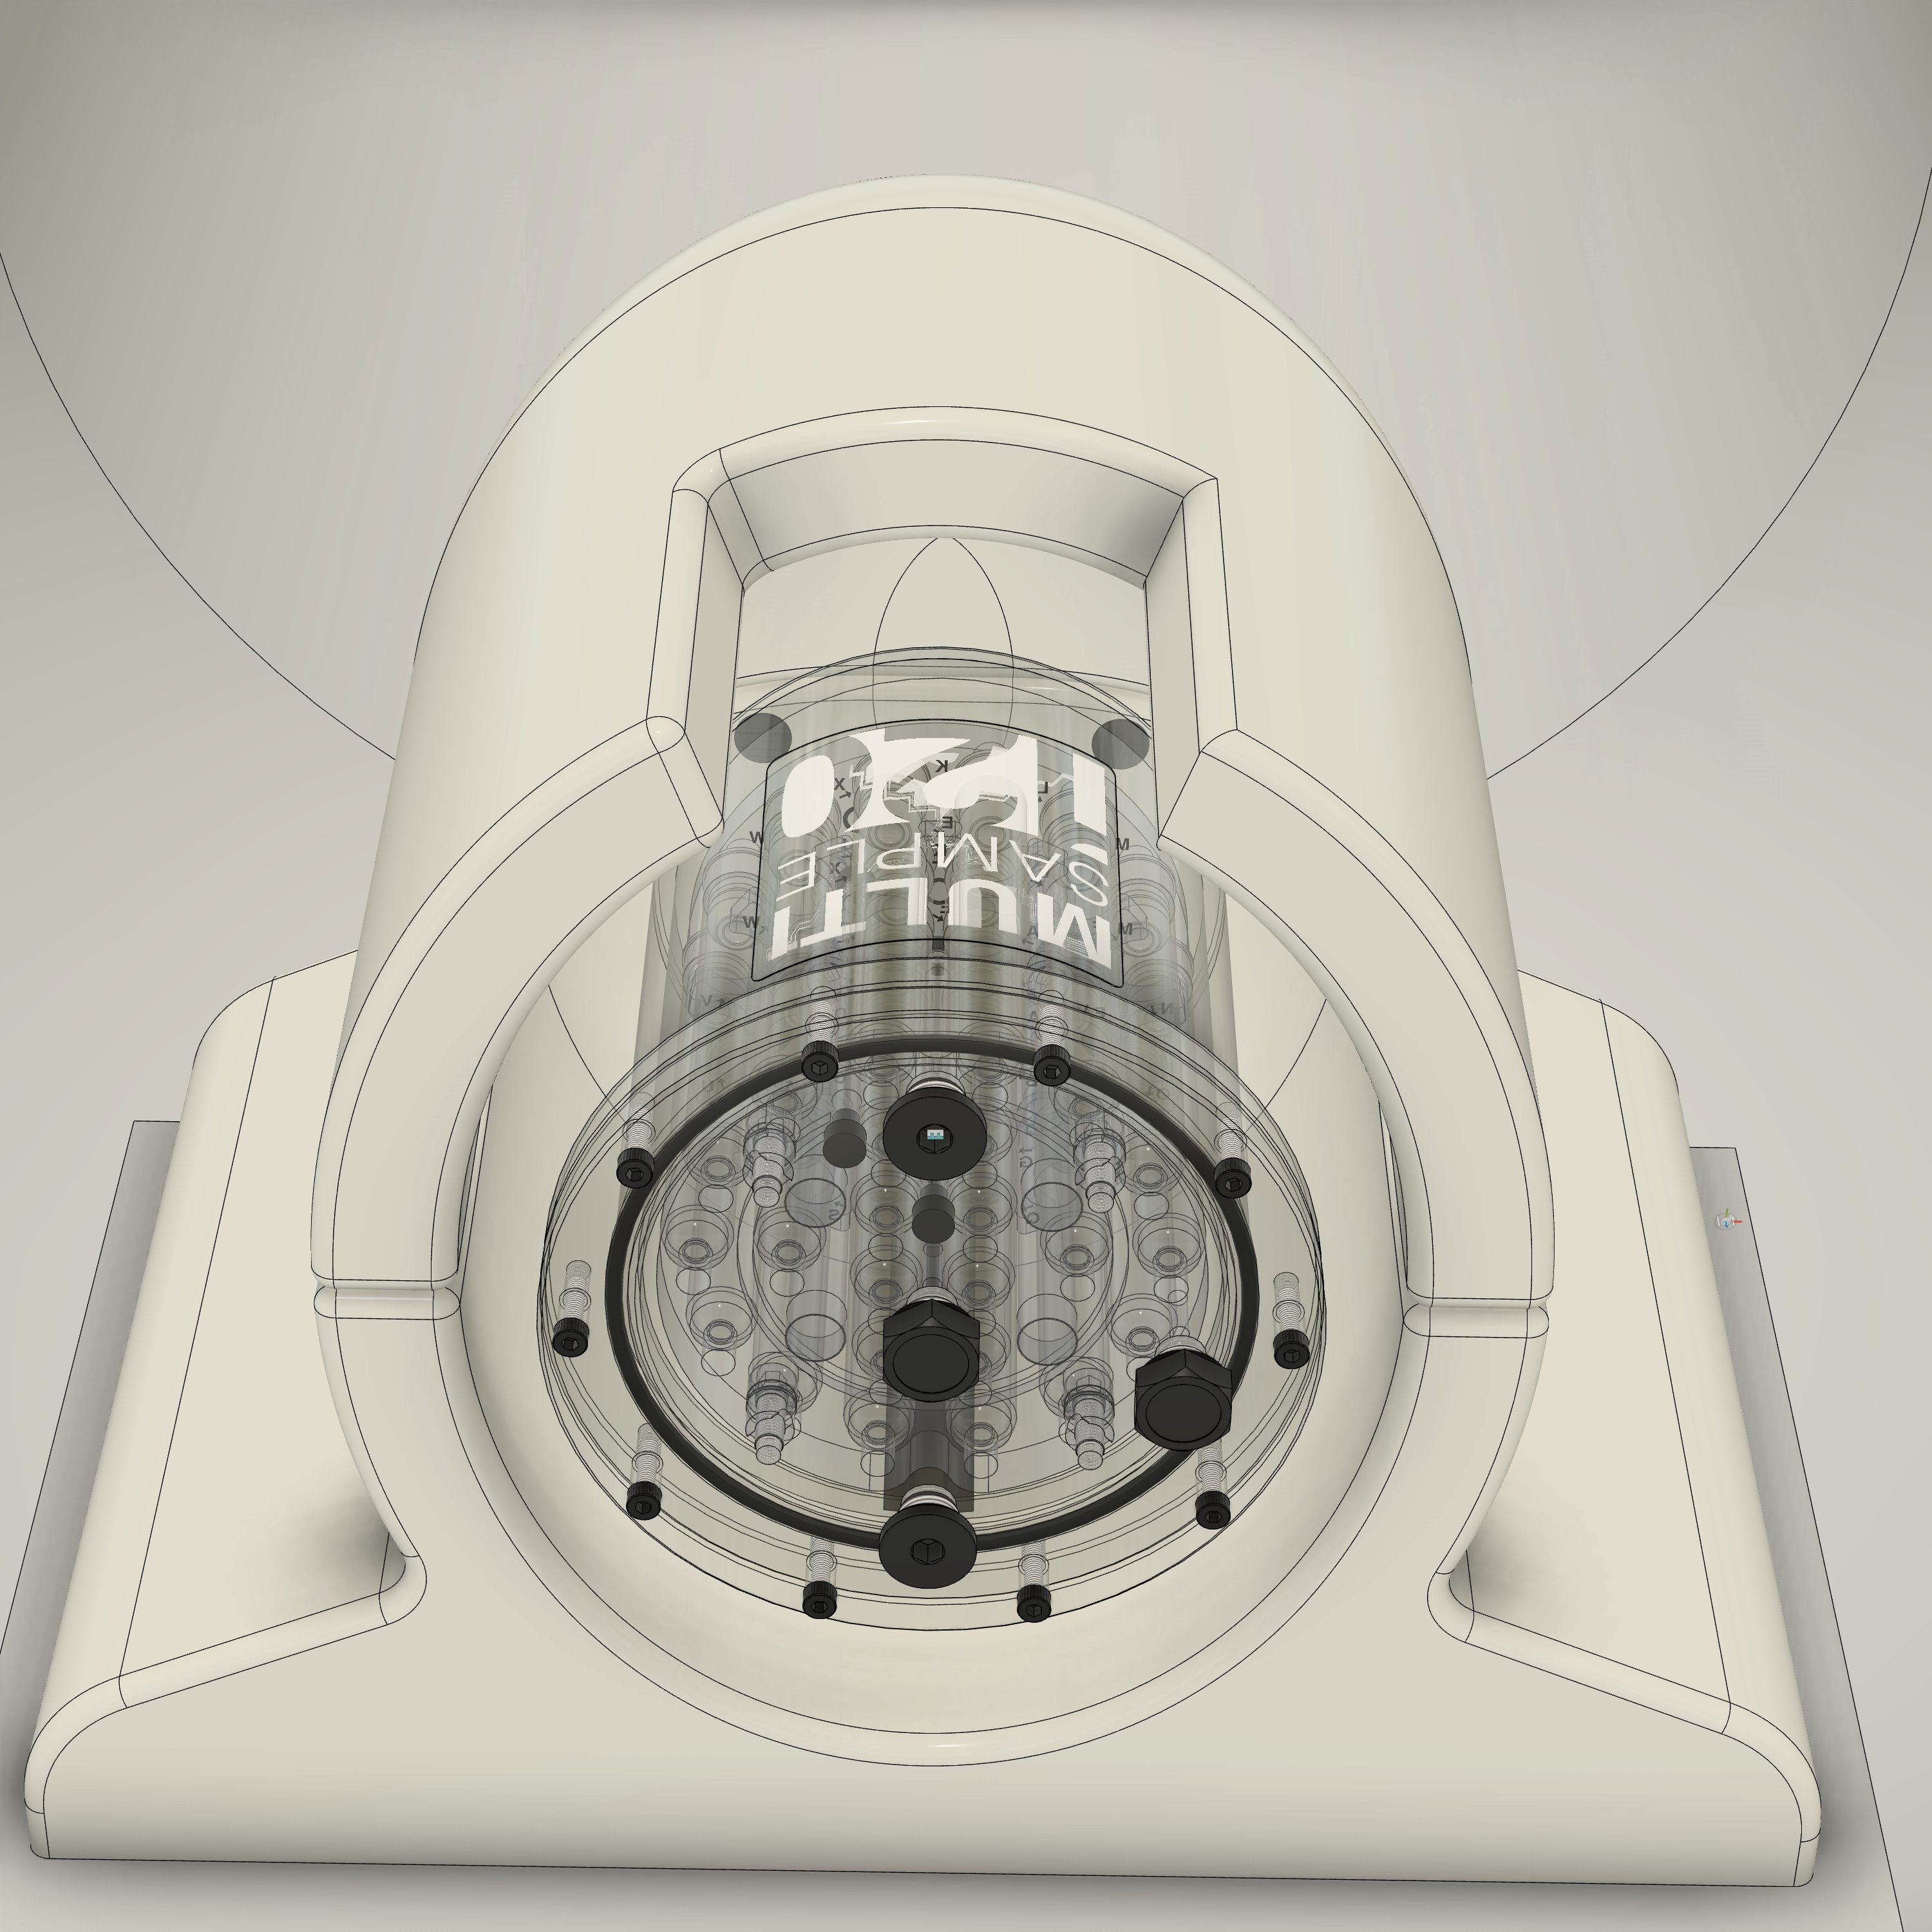
Figure 12: MultiSample120 (S, E, D) Orientation in a head coil
Adverse Events
Any adverse incidents that occur in relation to this device should be reported to Gold Standard Phantoms and the relevant competent authority of the member state.
Warranty
Standard Manufacturer's Warranty (SMW)
The phantoms carry as 1 year manufacturer’s warranty.
This covers assurance regarding quality / lifespan with a promise to repair or replace the MultiSample120D under a standard RMA. Shipping and Duty charges may apply.
Disposal
Do not allow the contents of the phantom to enter drains, sewers, or watercourses. Dispose of this material and its container as hazardous waste. Disposal should be in accordance with local, state, or national legislation.